Web Video Marketing
- Jun 1, 2020 modified: Feb, 05 2025
Web Video Marketing
Online Instructional Videos
Introduction
A website is worth very little if it can't be found.
Optimising your website for search engines is critical in obtaining high quality search engine traffic. And it doesn't have to cost a lot to do it well.
Skilled SEOs and web programmers think in terms of how Google behaves and reacts.
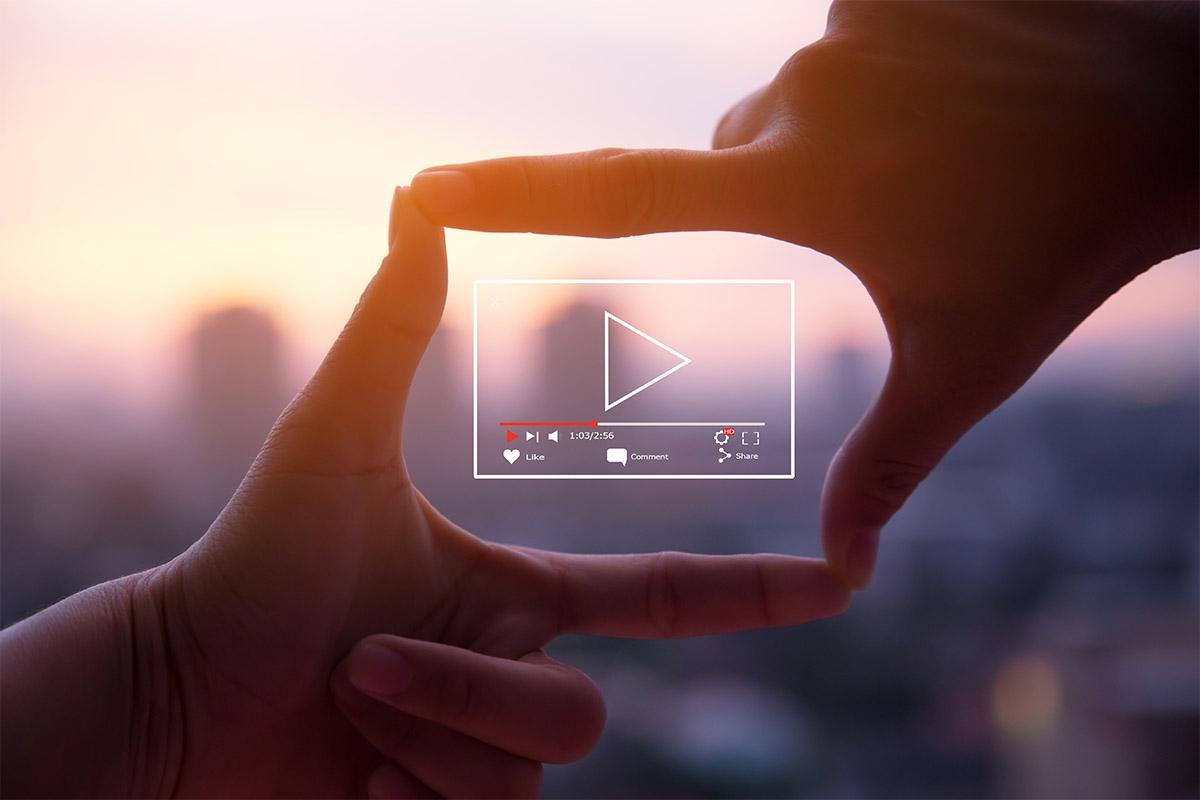
Combining YouTube and Vimeo films, animations and videos to enhance your website content has a significant SEO (Search Engine Optimisation) benefit.
Keeping people interested and on the page is measured by Google's algorithms and earns you valuable brownie points to keep your website high up in search page-rankings.
Most web video is either YouTube or Vimeo. Sometimes a short video may be included on the home page - if you employ Lazy Loading where the video is not loaded unless required there is an option to include an MP4 video.
Given that YouTube is owned by Google, the obvious scenario is that videos will become more prominent in the functions of a search engine and add to the future value of a website.
Low budget, high impact videos can be created without the cost of specialist animations, custom footage, custom voice-overs or graphic design fees. They can be made by one or two people with the aid of pre-made items and purchased stock footage, audio and sound effects.
Explainer Videos
The Explainer Video genre focuses on web videos that explain an idea or product.
The emphasis in Explainer Videos is giving visual explanations to:
1 Educate on a specific topic, product or subject matter;
2 Inform about a specific technique;
3 Sell services or products;
4 Instruct in the methods of doing something.
The key steps in planning and creating an Explainer Video include-:
- Preparing a Storyboard and Script
- Deciding on Text & Fonts for Titles and/or Sub-titles
- Selecting Audio/Music
- Choosing appropriate Sound Effects
- Accessing Graphics and Image Stock Content
The above summary of the steps involved in planning and executing a Web Video may seem a little daunting for first time web video-makers.
So the simplest approach to begin making videos for your website is to make 'No.4' on the list above of Explainer Videos, the sub-genre we call the Instructional Video.
Online Videos
Instructional videos are very suited to lifestyle, fitness, health and sports services such as lessons in Yoga, Health and Wellbeing; Martial Arts; Fitness and Physical Training; Food Preparation; Learning Musical Instruments; Arts and Crafts; DIY Home Improvements; Car Maintenance etc.
During the 2020 Covid-19 Pandemic "social isolation" period, group classes in yoga studios, martial arts schools and gyms etc were not permitted. Astute leaders and owners of businesses and service providers adapted quickly through the creation of short, online instructional videos and online classes to keep their existing members and clients engaged and as a strategy to attract new clients who were 'trapped' at home and looking for interesting activities in which to participate.
Instructional Videos, however, are not to be confused with Online Live Classes or Pre-recorded Lessons/Classes which may run for 45 minutes to 1 hour in length. Instructional videos are generally much shorter in running time.
Successful Online Live Classes require the Presenter/Instructor to be extremely confident and/or experienced in front of the camera. A detailed class/lesson plan that flows from the beginning to the end of the class is be prepared and if possible a second person is available to follow the presenter/instructor with the camera as they move around.
There are no second chances with Online Live presentations and classes. If something goes wrong, it will be seen by all those participating in or watching the class. So an Online Live Presenter must be adept at improvising and turning the unforseen into a positive without losing the flow of the lesson.
And to obtain a professional looking outcome for Online Pre-recorded classes the lighting, sound and images usually require an investment in equipment of a higher quality and with greater technical capabilities than a phone-camera.
On the other hand, recorded Instructional Videos are far more forgiving and allow the presenter/instructor to experiment and re-record the video before putting it up on their website and other platforms such as Facebook or linking to Instagram and Twitter. If you're not happy with the quality of the lighting, sound, camera framing or your performance as the Presenter, the video can be shot again with the only cost being time.
Instructional Videos
Instructional Videos are most effective if kept to 4 -10 minutes in length. If this timing does not allow for all the instructions or information to be explored then multiple 'episodes' of videos should be considered.
If the first 'episode' is short and engaging for viewers they are more likely to re-visit your site for the next instalment. For instance; if the instructional video is on the subject of martial arts, it may follow this pattern:
Episode #1 - Warm Up and Stretching Techniques;
Episode #2 - Introduction to Basic Blocks;
Episode #3 - Introduction to Basic Punches;
Episode #4 - Introduction to Basic Kicks;
Episode #5 - Introduction to Forms and Kata;
Episode #6 - Introduction to Sparring Techniques etc.
Strategically, by giving short free samples of training techniques and revealing the presenter/instructor's personality and approach, a business is more likely to attract new clients willing to pay for enrolments in and access to longer Online Live or Pre-recorded Classes; or have a better chance of retain existing members/clients who are not permitted to attend group classes during pandemic restrictions; and/or bring back existing clients and attract new members/clients to the studio/school when pandemic restrictions are no longer in force.
Part 1: The Instructional Video Presenter
- To Crew or not to Crew
- Presenter Training - Voice, Speech, Breath
- Presenter Techniques - Camera, Body, Conventions, Structure
Part 2: Filming Techniques
- Recording Equipment
- The Recording Space
- Lighting
Part 3: Post Production
- Editing, Titles, Graphics and Music
- Create a YouTube Channel
1. The Instructional Video Presenter
The short Instructional Video is more tolerant of unpredictable things that occur while recording and it is a chance for the Presenter to reveal their unique personality, energy, humour, knowledge and enthusiasm for their subject to their viewers.
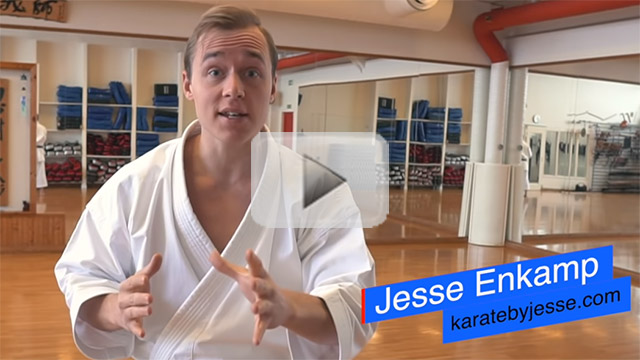
For example, take a look at the unique personality, enthusiasm and spontaneity of Jesse Enkamp, The Karate Nerd, in his instructional video on 'Stretching'.
To Crew or not to Crew
The presenter, Enkamp, enlists a camera-person as crew to hand hold the camera and follow him during the above Instructional Video. And the movement of the camera creates a high energy atmosphere to match Jesse's enthusiasm for karate.
However, the video could also have been recorded as a one person set-up with the camera locked off and only Jesse 'the presenter' in the dojo (studio). This would require the camera to be stationary on a tripod or stand and framed as a wider shot. However, this set-up does not allow camera movement or the framing variations we see in Jesse's video, such as the intimacy of close-ups on Jesse's face, then mid-shots of his upper body and full-shots of his whole body while demonstrating the stretching exercises.
Presenter Training
VOICE
A Television Presenter needs to develop exceptional communication skills, including a clear speaking voice and personal presentation skills. They may be required to remember dialogue or make a series points in a sequence and articulate their words clearly. Television presenters need to be confident and therefore must not be camera-shy. They should develop the skill of improvising quickly if necessary.
Training manuals for actors provide many vocal exercises to improve the clarity of speech, including tongue twisters. These exercises help strengthen the use of both the vowels and consonants that form the spoken words in most English and European languages. For example, try repeating the following tongue twister several times in a row as clearly as possible:
the lips, the teeth, the tip of the tongue
Or
red leather, yellow leather
And
she sells sea shells by the sea shore
Tongue twisters such as those above are also useful as a vocal warm-up before recording your Instructional Video. And use the full range of pitch in your voice while repeating the tongue twisters, rather than in a monotone.
SPEECH
There is an acting theory suggesting that if you under-value, shorten or clip the vowels in a speech or dialogue then you are not emotionally connected to what you are saying. If you drop the consonants out of the words you are speaking, you are not intellectually connected to your speech.
Practice using the full melodic range of your voice while vocalising the tongue twisters or reading your script or lesson notes aloud before you record your video. Just like going to the gym to increase the strength and flexibility of our arm and leg muscles, we also need to strengthen and flex our 'articulators' - the lips, tongue and jaw – and our vocal 'muscles'.
Don't get trapped into speaking in a monotone as it potentially puts the viewer off because it makes you sound like you are not enthusiastic or interested in the topic or subject you are presenting. If you sound bored, then it's likely your viewers will quickly become disinterested too.
Do not finish sentences with an upward inflexion (unless you are asking a question) because it makes you sound like you are doubting yourself or asking a question rather than making a statement. At the end of a point that you're making, finish on a downward inflexion on the last syllable. This makes you sound more like an expert and that you know what you are talking about.
When speaking, find a pace that suits you and allows you to speak clearly without tripping over words.
BREATH
Fill up with breath at the start of each sentence and keep speaking until the end of the sentence before breathing in again. (Try saying that previous sentence on one breath as a practice run). Do not break up whole sentences with in-between breaths because it interrupts the flow of ideas you are expressing within the sentence. This is where singing training comes in handy for those who want to be presenters.
Practice holding conversations with people without using filler words like "um" or "ah." If there isn't anyone to practice holding conversations with, try reading out aloud from a newspaper article, a book you are currently reading or from the script or notes you have prepared for your Instructional Video.
Watch professional TV Presenters to see how they interact with the camera and use their voices.
Take as many opportunities as you can to be in front of the camera to get more comfortable and watch it back to see what seems to work for you and the camera.
Be a storyteller. ...Be yourself.
Presenter Techniques
CAMERA
Make sure you are on screen when first speaking in an Instructional Video. Do not be a disembodied voice (voice over) that then walks into the camera frame unless it is for some comic or dramatic effect.
Address the camera as though you are having a conversation with one of your students or a person you know well and look down the camera lens as you speak unless this is not possible while demonstrating elements of the exercises/techniques you are instructing.
BODY
Be expressive in your body language. Unlike radio, video is a visual medium so be physically animated but not too quick with movements. Wear the appropriate 'Instructor's' costume, uniform, work-wear, training and/or footwear for your instructional video. Have whatever props or objects you need on hand and set in position for your instructions and your demonstrations of various techniques.
CONVENTIONS
Create conventions by starting the video with a greeting and introduce yourself by name. Each new episode should have a similar introduction and greeting to create consistency of the relationship with clients old and new and so that you become a familiar part of their lives. Then introduce the topic for this 'episode' and explain why it's important and what the viewers may expect in this episode.
STRUCTURE
Most professional actors will admit their biggest fear is forgetting lines and not remembering the script. If you like writing and memorising scripts then go ahead with that approach.
But if you know your topic so thoroughly that you can just speak off-the-cuff without a script or notes, then that style of presenting may work best for you.
Or if you are somewhere between those two approaches, make some dot points on a sheet of paper or white cardboard that you can tape closely to the side of the camera or just underneath the lens and refer to them as required. In the professional studio, the presenter or news reader often has a 'tele-prompter' machine mounted on the front of the camera with the visible script being scrolled up with the next lines as the presenter or news reader speaks.
If you aim to shoot a 10 minute Instructional Video, include 30-seconds to 1 minute buffer time at the beginning for your greeting and introduction and buffer time at the end of the lesson for a farewell and perhaps include a hook or a teaser regarding the next episode (if there is one) that the viewer can look forward too i.e. 1 minute intro/greeting; 8.5 minutes instructional content; and 30 second farewell and teaser for the next episode.
Find a balance between your spoken instructions and explanations when you speak directly to the camera and at appropriate moments looking away from the camera to focus on the props, objects and/or the physical demonstration of techniques i.e. don't be a total 'talking head' that always looks at the camera.
While recording, be willing to improvise if things don't go exactly as planned. Sometimes the happy accidents that occur while recording become the best version of the video and reveal the human element to your presentation.
2. Filming Techniques
The Recording Equipment
Instructional videos of acceptable quality can be filmed on smart-phone cameras; i-pads, tablets and digital-video cameras. The purchase of an external microphone to attach to a phone or video camera will enhance the quality of the sound recording.
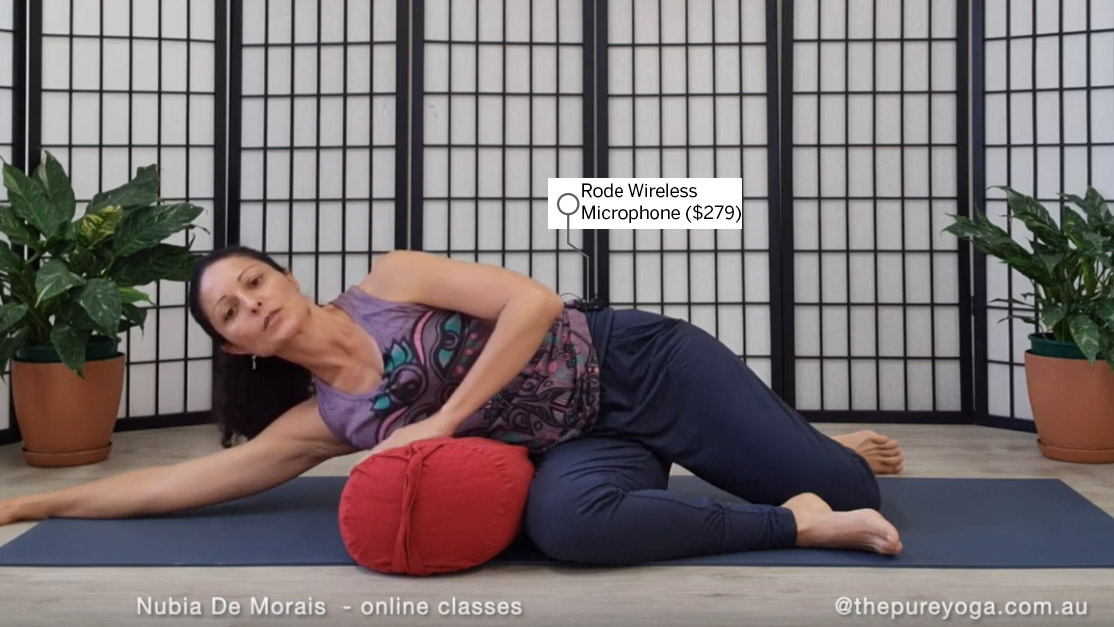
For example, a modern mobile phone can be coupled with a Rode Wireless Lavelier Microphone through the appropriate App and can be worn as a lapel microphone as used by the presenter Nubia in her Instructional Yoga Videos for The Pure Yoga.
The extreme physical action required in martial arts instructional videos may dislodge a lapel microphone or prove to be unsuitable with the noise created when clothing is being ruffled. In these circumstances of high physicality it may be necessary to use the existing in-camera microphone or attach a high-quality microphone. Rode has moderately priced models of shotgun and directional microphones that can be attached to video cameras and phone cameras.
In many recording spaces (studio, living room, classroom etc) an external microphone or microphone attachment is not always necessary if some simple tricks and techniques are employed in the preparation of the recording space.
Prepare the Recording Space
To eradicate echoes or hollow sounds in the recording space, place soft fabrics or unused curtains on furniture or attach them to walls around the room that will not be seen during the filming. Place empty cardboard boxes and/or pillows and cushions around the floor where they will not be filmed. This will help take the hollowness out of the sound being recorded on video.
Do some test recording with a friend to see how much space you need to conduct the demonstrations in your Instructional Video and how it looks. Then mark up the space accordingly.
Remember, viewers at home probably won't have a studio or large area, so to cater for them you should assume they will be following your instructions in a much smaller space like their bedroom, garage, kitchen or living room.
You won't need an extra person for the camera if the size of the space in which you are filming can allow you to place the camera on a tripod, stand or table. You then lock off the camera framing (not too far away and not too close) so that wherever you stand, lie or move during your instructions or demonstrations of techniques, you can still be seen by the camera.
When using the camera's in-built microphone, remember that generally the further away the camera is from the Presenter, the less effective and the lower the quality of sound recording. Your specific situation may determine whether the Presenter needs to wear a lapel microphone or if a directional or shotgun microphone needs to be attached to your camera.
If you require more movement and a bigger space for your Instructional Video, you may need to engage the services of a friend or colleague to follow you with the camera as seen in Enkamp's 'stretching' video.
Alternatively, look above at the use of the locked off camera in The Pure Yoga video with Nubia wearing a lapel microphone connected to a Rode Wireless Go that operates through an App on her smart-phone camera. Also note the calm setting, props and decor Nubia has chosen to complement and enhance her 10 minute Yin Yoga Instructional Video without the set dominating the space.
The Karate Nerd, gives further technical tips and filming examples in his Instructional Video, "How to teach awesome online martial arts classes".
Lighting
Lighting your recording space can be easy if there is a large window allowing a natural daylight source. The Presenter faces the window with the camera facing the Presenter and pointed away from the window. If the daylight is too harsh then you can experiment with softening and diffusing the light by hanging some see-through fabrics at the window. In this situation the window light acts as your 'Key Light'.
In addition to a Key Light, the final recording usually looks better if there is also some 'Filler Light', especially if you do not have a natural source of light such as a window. Rather than purchasing expensive 'professional' film lights you might consider purchasing some reasonably priced work-lights and stands from the local hardware chain.
The two main types of work-light have either LED lamps or Halogen lamps.
Depending on the atmosphere you want to create the LEDs tend to be cooler lights and read more as blue tones on camera, while the Halogen light tends to read on camera as a warmer light source.
However, Halogen lamps can get quite hot to handle and require the wearing of protective gloves if you need to move them around during the shoot. LEDs are safer to use with coloured gels/filters (cellophane paper or professional quality) because they don't run the risk of setting the gels on fire as can occur with Halogen lamps. Gels allow a wider range of lighting colours and atmospheres to be created in the recording space. Sheets of professional-quality colour gels can be purchased from Staging companies who supply live concert equipment and associated gear.
If using two lights, the Key Light can be set in front of and at 45 degrees to the presenter and the Filler Light straight on to the presenter, behind the camera and at a greater distance then the Key Light.
However, to create a three dimensional feel to the Presenter on camera, a third lamp that is also not seen on camera, can be placed above and behind the presenter on a 45 degree angle (diagonally opposite the Key Light) as a Back Light Filler. The relative intensity of each light is controlled by the distance they are from the set and Presenter you are recording and/or through the use of gels over the lamps.
You can experiment and shoot some test video to find the best positions and distances from the Presenter for the placement of your lights so that no harsh shadows on the face, body or walls are captured in the shot and the expressions on the presenters face can be easily seen by viewers.
Post Production
Editing, Titles and Music
While not absolutely necessary (as shown in Jesse Enkamp's videos) some video-makers like to edit their recordings and play with special effects, before uploading their completed Instructional Videos.
There are now affordable Editing Apps that can be downloaded to allow the Cutting and Editing of 'footage' and the additions of Music, Sound Effects, Voiceovers, Photos, Graphics, Titles and Texts in the creation of Instructional and other Explanation Videos.
Create a YouTube Channel
A quality SEO can assist you to create a YouTube channel with a back-end that allows you to easily add new videos to your page at any time. Creating your own short Instructional Videos is a good way to get started with your YouTube Channel.
You are given the options of including the following information to accompany your videos when placing them on the YouTube platform:-
Promotion Image: the image you would like displayed as the video to be played which can dramatically increase the number of direct clicks in YouTube.
Title: important for being found on YouTube - keyword research is essential.
Description: important for being found on YouTube, this can also contain a link to your page.
Tags: important for being found on YouTube - similar to keywords.
Category: e.g. Yoga - Lifestyle, Health and Wellbeing
Size: depends on your audience and the type of information in your video. For example, if screen capture (live screen capture from your computer) is used this will influence the maximum resolution you can use but still have the video quality looking good e.g. (1280 x 720 pixels)
When you develop skills such as creating Web Videos, you increase your potential to earn a long-term passive income; you are better equipped to handle a business downturn; your business is more resilient; and your income generation is less concentrated on one stream such as "getting people through the door".
Contact goldcoastlogin.com.au - your SEO responsive web site developer - if you require assistance to get started with your short Instructional Videos or wish to delve deeper into the world of Explanation Videos, Online Live Classes or detailed Pre-recorded Videos to promote your products and services.
Researched, Compiled, Created and Written by Dr Steven Gration (BEd. PhD) - May 2020
Related Video Content
Web Videos and Motion Graphics
Low budget, high impact videos
Using the potential of YouTube
Search News Articles...
Recent Articles

Does Instagram Boost SEO?
- Jun 02 2026
- /
- 134

The Growing Gap Between Coding and Engineering
- May 16 2026
- /
- 208

Have AI Agents Destroyed Social Media?
- May 05 2026
- /
- 295

Your IP Address and SEO
- Mar 06 2026
- /
- 565

Keywords no longer as visible in GSC
- Jan 12 2026
- /
- 1261

Unique Web Systems Matter in a World of Sameness
- Dec 26 2025
- /
- 862

Most AI Websites Fail to Rank
- Nov 18 2025
- /
- 1217

Sitemap.xml Best Practices
- Oct 14 2025
- /
- 4130
Fake Reviews on Google My Business
- Oct 07 2025
- /
- 1040

Sending Emails from Code
- Sep 17 2025
- /
- 1130
View All News Articles
Categories
A Gold Coast SEO and Web Developer